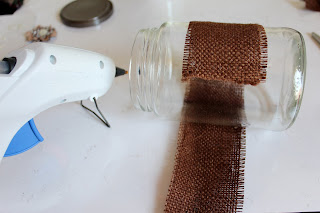
Step 1: Gather your supplies:
A jar ( I used a pickle jar )
Some Burlap
Ribbon
Buttons and Flowers
Hot Glue/Gun
Scissors
Sandpaper
Spray Paint
Xtreme Goo Gone ( and paper towel)
Step 2: Using your Xtreme Goo Gone, soak a corner of a paper towel and simple wipe the glue residue off your recycled jar. Don't forget to wipe off the ink code thing they put on the jar. (I'm pointing to it in the picture below.)
Step 3: Get out your sandpaper and scratch up the jar lid. Don't forget the sides!
Step 4: Get out your spray paint, I used this cool "hammered" looking finish in brown. I think I got it at Lowes Hardware store. This is probably the most expensive part of this project. You don't have to use something fancy like this, a simple cream or black will work. I just already had this in my garage, so its what I used and it also went with my color scheme. I ended up doing two coats of paint. You can follow the drying times on the can of spray paint.
Step 5:Now that my lid is dry, its time to work on the decoration of the jar. I had some brown burlap that I found at a yard sale for 50 cents! Yeah I know, awesome right! I measured my jar and cut a piece of burlap with about half inch of overlap. I centered it on my jar and CAREFULLY used hot glue to secure it. After that I did the same thing with my ribbon. (Don't forget to heat seal your ribbon with a lighter to prevent fraying!)
Above: Its okay to have some fraying, it looks more rustic that way. I actually made it fray by pulling some strips off the sides.
Above: You cant even tell there is a seam there! I know I rock!
Step 6: After you are done with the burlap and ribbon, its time to add some decoration. I did something simple here. I just stacked some paper flowers together and topped it with a button. You can really do whatever you want here. Add a collage of buttons or maybe a fake flower. I just used a dot of hot glue between the flowers and the button as well. Then hot glued it to my jar.
Step 7: Almost done! Now fill your jar with your bath salts and put your lid on. If you want to be even fancier, you can buy lavender scented bath salts and mix it with actual lavender flowers.
Above: Before and After
Above: Ta-DAAAAAA! So much better!


No comments:
Post a Comment