Thursday, June 20, 2013

Bath Salt Jar

So maybe I am crazy but I always keep the jars after I am done with eating whatever was in them....There are so many uses for them and even better I can make them look "pretty." You would never think that their original use was to hold pickles or sauce. So I love taking baths, and now that I have a wonderful soaker tub I can do just that whenever I want too. So I kept looking at my ugly bath salt jar and thought that's so tacky, how can I make it look better......well here is your answer....not to mention its cheap and easy. And it would make a nice gift for your friends, they will probably think you spent a lot more on it then you really did.

Step 1: Gather your supplies:
             A jar ( I used a pickle jar )
             Some Burlap
             Ribbon
             Buttons and Flowers
             Hot Glue/Gun
             Scissors
             Sandpaper
             Spray Paint
             Xtreme Goo Gone ( and paper towel)

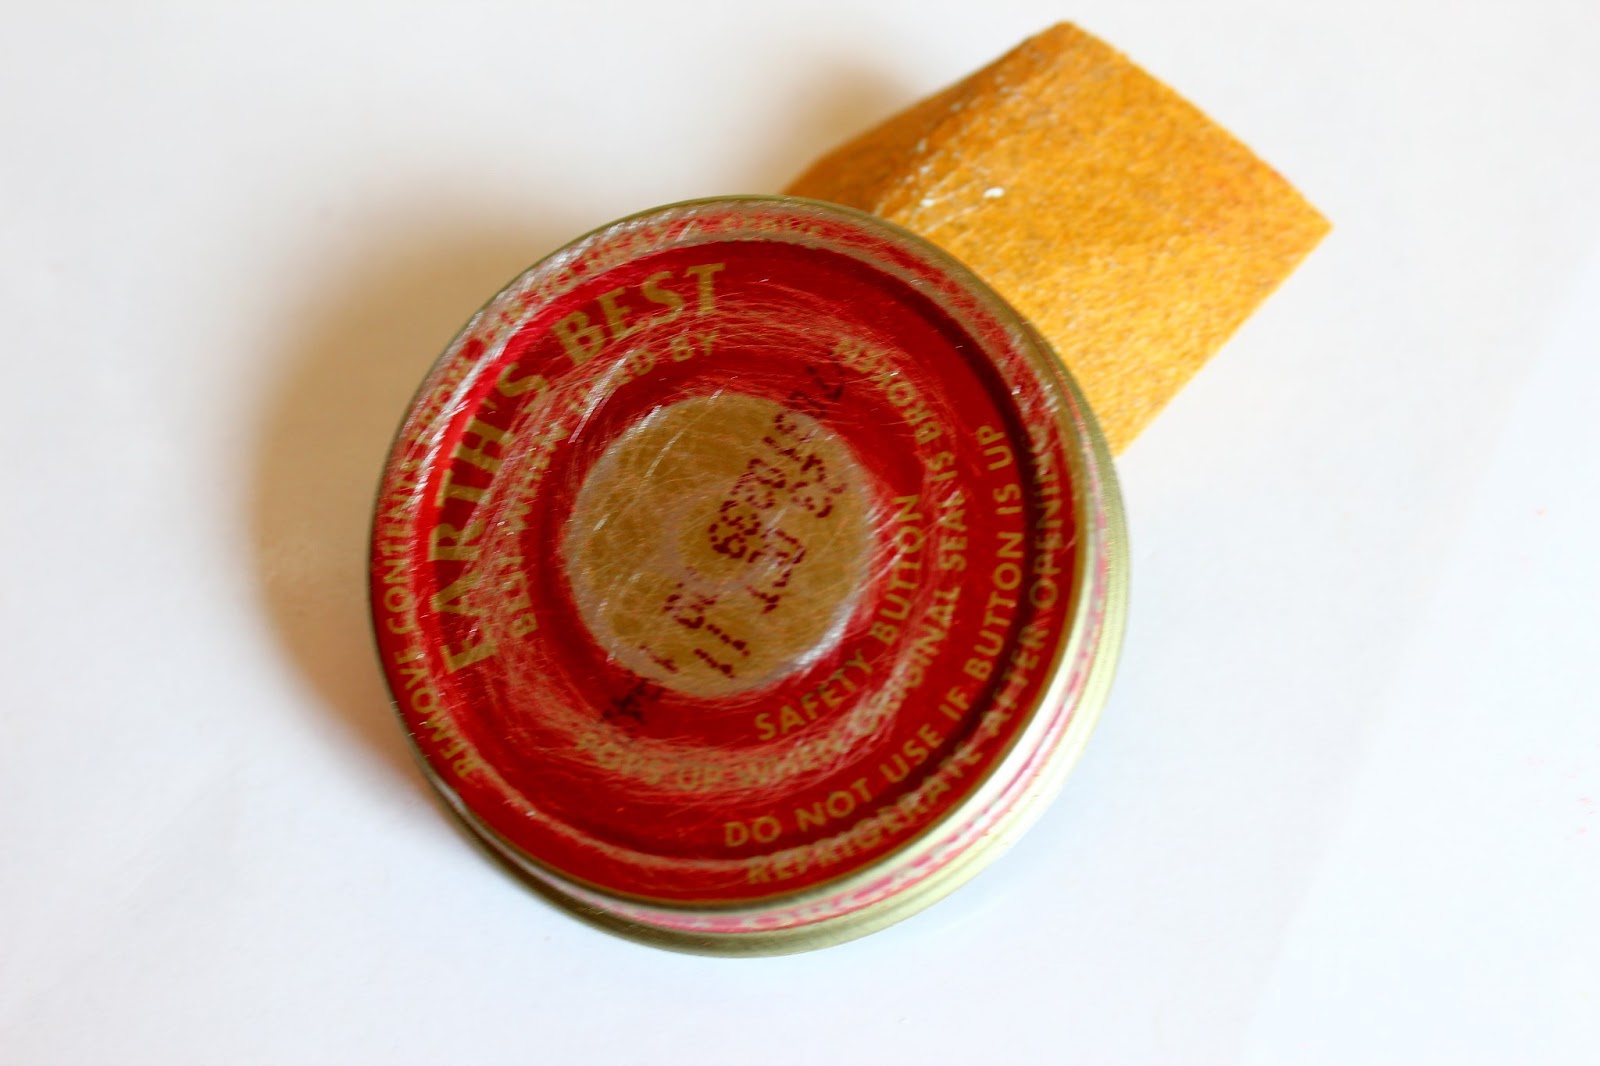
Step 2: Using your Xtreme Goo Gone, soak a corner of a paper towel and simple wipe the glue residue off your recycled jar. Don't forget to wipe off the ink code thing they put on the jar. (I'm pointing to it in the picture below.)

 Step 3: Get out your sandpaper and scratch up the jar lid. Don't forget the sides!

Step 4: Get out your spray paint, I used this cool "hammered" looking finish in brown. I think I got it at Lowes Hardware store. This is probably the most expensive part of this project. You don't have to use something fancy like this, a simple cream or black will work. I just already had this in my garage, so its what I used and it also went with my color scheme.  I ended up doing two coats of paint. You can follow the drying times on the can of spray paint. 

Step 5:Now that my lid is dry, its time to work on the decoration of the jar. I had some brown burlap that I found at a yard sale for 50 cents! Yeah I know, awesome right! I measured my jar and cut a piece of burlap with about half inch of overlap. I centered it on my jar and CAREFULLY used hot glue to secure it. After that I did the same thing with my ribbon. (Don't forget to heat seal your ribbon with a lighter to prevent fraying!)


Above: Its okay to have some fraying, it looks more rustic that way. I actually made it fray by pulling some strips off the sides.
Above: You cant even tell there is a seam there! I know I rock!
Step 6: After you are done with the burlap and ribbon, its time to add some decoration. I did something simple here. I just stacked some paper flowers together and topped it with a button. You can really do whatever you want here. Add a collage of buttons or maybe a fake flower. I just used a dot of hot glue between the flowers and the button as well. Then hot glued it to my jar.
Step 7: Almost done! Now fill your jar with your bath salts and put your lid on. If you want to be even fancier, you can buy lavender scented bath salts and mix it with actual lavender flowers.


Above: Before and After

Above: Ta-DAAAAAA! So much better!


Thursday, June 13, 2013

Beach Memory Jar

Okay on my "busy" schedule I finished another craft project today. I also took some great photos of my baby girl (two months officially today). But back to our Beach Memory Jar project......
 See isn't she a doll! Okay for real....its craft time!
 
Step 1.....Gather your supplies: I used a baby food jar but you can use any size jar. I used a small one because I didn't have a lot of stuff to put in it. Sandpaper, this is just what I had handy. Spray paint, sand from the beach, and some Goo Gone. Oh and some Mod Podge and paint brush of course.

Step 2.....First I took a small piece of my sandpaper and scratched up the lid, this helps the paint stick. Don't forget the sides of the lid as well.

 Step 3......So then I peeled off the paper from my jar and there was some leftover adhesive so I got my Goo Gone and rubbed it off with a paper towel. This is "xtreme" Goo Gone but I think the regular stuff will work just fine too but you might have to scrub a little harder. If you don't have Goo Gone, try paint thinner or I've even heard that if you boil the jars for several minutes that it will scrub off. Oh yeah or try nail polish remover....okay enough about that I swear!

 Above: See yucky!
Above: So much better eh?
 
Step 4....I already had this spray paint from another project so I just used it. You want a cream or sand color because you will see a little of it after you cover it with the beach sand (seen in a later step). I did two coats to make sure that everything was covered. I also put my lid on a small can so that I could get all the sides and didn't have to worry about the lid sticking to the cardboard. 

Above: Oops sorry husband I got some paint on your W-D 40 can. Shhhh he'll never notice....
 
Step 5....Then after your lid is dry, paint the entire lid top and sides with an even layer of Mod Podge. Cover it with your beach sand, and let dry.  After it has dried, paint over your sand with another layer of Mod Podge. It may look funny now, but when it dries it will look like wet sand and it won't shed all over your house or when someone touches it. I also folded a piece of paper and poured my sand on top of that paper so that I could pick it up later and pour it back into my bottle.


  Some other ideas for your lid: you may add an old knob or even a shell or rock that you collected from your trip to the beach.


 Above: what it looks like with the second layer of Mod Podge.
 
Step 6.....Yay almost done! Fill your jar with your beach treasures. I have rocks, beach glass and shells in mine. You can even add a little tag on the bottom of your jar with the name of the beach and the date you collected your treasures.

Above: Neat rock with a hole in it! I also LOVE beach glass!

Scrabble Magnets

Today is a quickie craft project. I made some cute magnets using old scrabble tiles, magnets and my handy dandy hot glue gun. Father's day is this Sunday and even though my hubby already got his drill set early I want him to have a little something extra.  You can make these for anyone for any occasion. I made some "man" like words for this one, but it would be cute to make them for other holidays or even just names for family members.
 I had some long strips of magnet that I just cut to size and working quickly after I put a layer of glue on my magnet strip placed the tiles down firmly.

  Above: These I think were suppose to be self adhesive but they must have lost their stickiness.
 Above: TA-DA! I figure my hubby can put these on the freezer out in the "man place" aka garage.
Above: Or maybe his chalkboard/magnet board also in his garage.

Wednesday, June 12, 2013

MINI WREATHS!

Yay time for my first craft project! Okay so today ladies and gents we are going to be making mini wreaths. We've come along way in the world of wreaths, they are no longer only for Christmas. These are also super cheap to make as well.

Step 1.....Get your sh$# together! I mean kindly gather your supplies. For this I used my handy dandy hot glue gun, some shower curtain rings from the $dollar$ store, some left over yarn, a ruler, scissors,  a piece of ribbon about 16 inches long (size may vary depending on the purpose of your completed mini wreath), a lighter, and some buttons or dilly dads AKA felt shapes I found in my craft box.

Step 2..... Using your hot glue gun, glue the shower curtain ring together....yes I know it may snap together but we want to make sure it never comes undone down the road. Also there is a little hole and gap that may remain so just fill it in with hot glue. BE CAREFUL and don't be dumb, hot glue can burn you. If you aren't a seasoned crafter keep a bowl of ice water near by incase you get hot glue on your fingers. As you can see you can be a little messy with the hot glue, we are gonna cover that up later. No one will ever know, unless you tell them or they take apart your mini wreath to expose you! But highly unlikely....


Step 3... . Grab your yarn. I made a smaller ball so that its easier to work with and also fits through your shower curtain ring. Wrap the end over several times to secure it, then go around and around and around the circle until you can no longer see the shower curtain ring. After you return back to the top of the wreath (the fatter part that you glued together) you can loop your ends together (kinda hard to explain) or even easier put a small dab of hot glue and sink your yarn end there. You wont see it anyway because you will be tying a piece of ribbon over it next.  


Step 4....Okay now that your wreath is all wrapped with yarn, grab your ribbon (center it in the middle of the ring) and tie a double knot over the spot where you glued your shower curtain ring together. Then tie another knot at the end of the ribbon. You may want to heat seal the ends of the ribbon with a lighter to prevent fraying. To heat seal simple take the lighter and quickly flash the ends of the ribbon with the flame.


Above: Bad fraying ends! Heat seal those bitches!
 
Above: See much better


 Step 5... For this wreath I just glued a red button on top of a green button, then glued that one on top of the ribbon aka the largest part of the shower curtain ring.


 Ta-DA! You are done! You went from cheap ugly shower curtain ring to cute mini wreath!


Below are a few that I have made. You can use them as Christmas ornaments....OR.....


 I made a girly one for my daughters room, and hung it from a door handle.
 

They can also embellish a gift bag....like sooooo

I think next I will make some and instead of buttons use some old scrabble tiles to serve as monograms cuz those seem to be in these days. I gotta stay hip with the times lol.